
Facing the holidays without your baby, or when you know your baby's life is going to be short, is overwhelmingly hard. Please, above all else, be gentle with yourself.
If you'd like to connect with other loss families facing the holidays without their children, you can join the private group on Facebook, HERE.
We hope you find peace and healing in the days to come <3.
~ ~ ~
When my daughter, Eve, was stillborn, the holidays quickly became my least favorite time of the year. And it wasn't just because she died just a week before Thanksgiving. There's something about the holidays that makes us realize with extra clarity both the loveliest and the hardest things in our lives.
Every holiday celebration was, for me, excruciatingly highlighted by her non-presence. For the first couple of years after her stillbirth, I could feel the holiday season coming in my body -- starting in the beginning of November, my muscles would be incessantly taut, my jaw clenched, my heart aching more than usual. I did my best to breathe and get through it, exhausted by the turn of the new year.
I don't have much advice on how to survive the holidays as a grieving person, except that you do what you need to get through it. Avoid parties, cards, people, and whatever else if you can't handle them. Let yourself ache. Invest in a massage or see a therapist for extra support. Boil life down to the pure essentials. Journal angry/sad/silly/lonely/dizzy. Make art. Sleep a lot. Eat some chocolate, watch a lot of reality TV. You have permission, no matter what anyone else may say. Your allegiance is first to your own heart.
That said, I have enjoyed the small tradition I've set for myself of purchasing a new tree ornament every year for our Eve. No matter how people do or do not remember her, I can look at the tree and see evidence of her life in ours, evidence of how her tiny existence changed mine forever. And, in ways sometimes small and sometimes large, this helps.
Today I have a simple tutorial to guide you through creating your own memorial ornament. It makes of use only a few supplies (I encourage you to use what you have around the house as much as possible) and is quite unintimidating for those newer to arts and crafts (said the artist who, paradoxically, is terrified of crafts). Enjoy, and I'd love to see your ornament in the 12 Days of Christmas Facebook group if you try your hand at it!
Easy Memorial Holiday Ornament Tutorial

Supplies:
- blank ornament (I used a ceramic star purchased at Michaels)
- two colors of craft paint
- adhesive (I used a glue stick and a decoupage glue)
- scrap papers and old book pages
- scissors
- paintbrush
- an old credit card or gift card (or a firm piece of cardboard in a pinch)
- ribbon
- glitter (optional)

Start with your ornament on a flat surface.

Begin collaging scrap papers onto the ornament's surface. Be sure to put adhesive on both the ornament and the backs of the papers for the best adhesion.

Be sure to firmly run an old credit or gift card over the papers as you glue them to the ornament to remove air bubbles. You can also smooth the bubbles out with your fingers. One you are finished collaging, allow the ornament to fully dry.

Apply your first layer of paint. Pick two colors that complement each other and are meaningful to you. Allow the paint to fully dry.
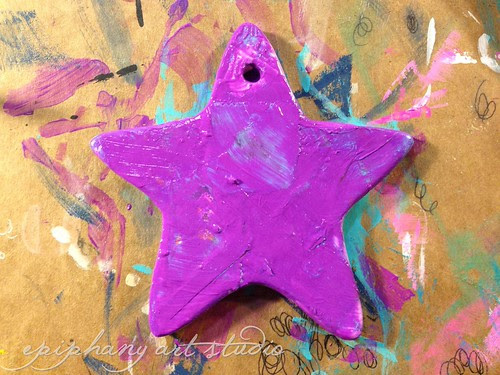
Apply your second color of paint.

While your second layer of paint is still wet, firmly press a piece of paper across the ornament's surface.

Carefully peel the paper back. You've now easily created an interesting and textured multicolored effect, and you can use the "stamped" shape on the paper to make a gift tag (or something else entirely!) if you wish. Allow the paint to dry fully.
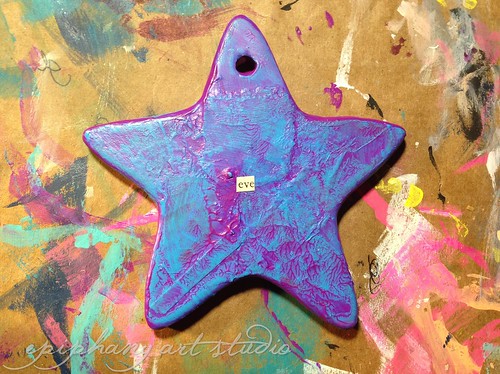
Next, collage your baby's name onto the ornament. I was able to find Eve's name intact in an old book, but you could cut out individual letters and glue them down, or print your child's name off the computer and adhere that. Additionally, you could write your child's name with a gel pen or in paint if you wish. At this point, I also painted the surface in decoupage glue and sprinkled glitter over it. Allow the ornament to dry fully before threading an lovely ribbon through the hole.

And there you have it! A handmade memorial ornament for your tree (or your home) that affirms the precious life of the one you are missing so deeply.

May your holidays be gentle and surprisingly sweet, and please be exceedingly kind to yourself. You both need and deserve it.
~ ~ ~

Beth writes, paints, and dreams in Montana. She is the author of The Light Between Us, a new adult romance, and the creative healing workbook Life After Eating Disorder, and is also the owner of Epiphany Art Studio. Her words and art have appeared in various publications, such as Somerset Studio, to linger on hot coals, Still Standing Magazine, Wild Goslings, and Disney's Family Fun. In addition to her quirky little family and their three naughty dogs, Beth is in love with luscious color, moon-gazing, and dancing wild. She writes soul into flesh at her blog.


0 comments:
Post a Comment
Note: Only a member of this blog may post a comment.